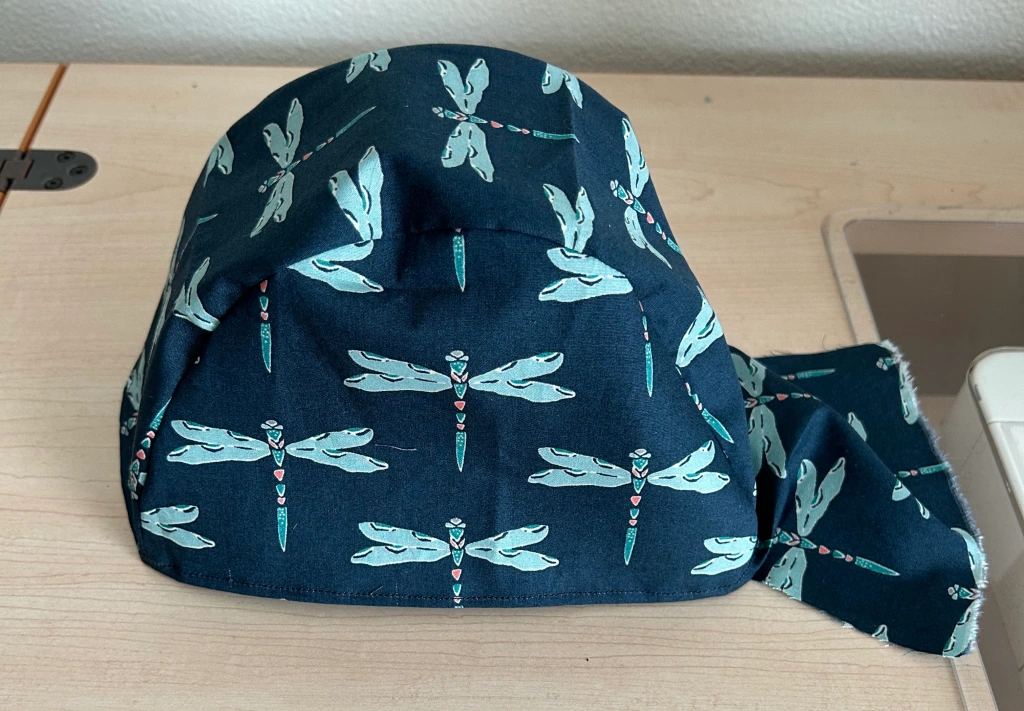
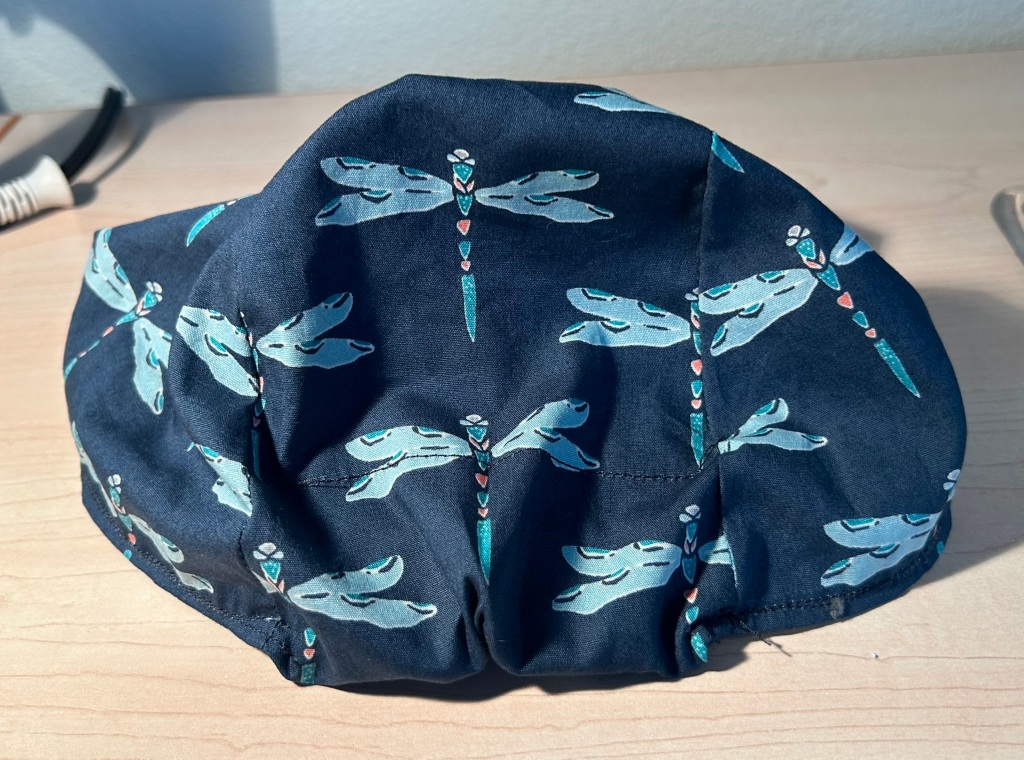
A cycling cap is useful in so many ways. It keeps the hair in place. Sweat is managed. It shades the head and face from direct sun. It can be micro-adjusted to block the glare from oncoming headlights. The thin fabric allows it to fit under a helmet. Pulled down a bit, one can get into introvert mode. Pulled low enough, it’s how I begin a nap. The sun protection will make my dermatologist happy.
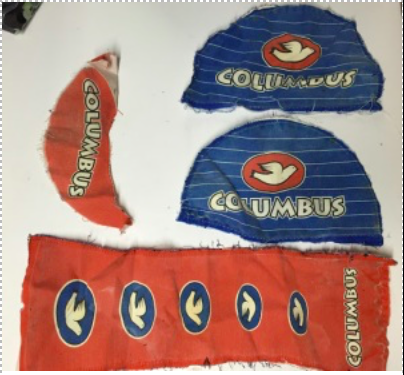
Years ago, when my old Columbus hat was starting to disintegrate, I know there would be a long and difficult search for a replacement. My head is BIG and few hats would fit it. And I didn’t want to be a walking advertisement for a business, with a logo covered hat.
I made about 100 hats so far. It is not an easy project at first. Your initial caps will not be that great, but will improve with practice. I suggest start by using cheap or recycled fabric. Like an old shirt you don’t plan to wear again.
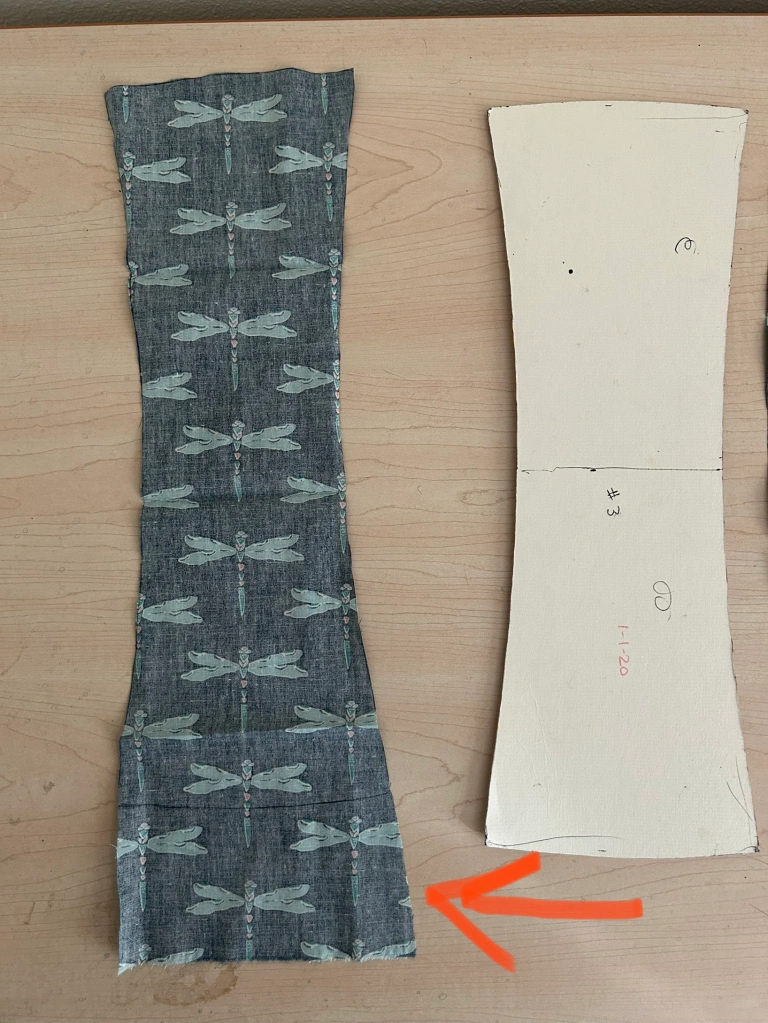
Rather than hunting for an online pattern, it made more sense to me to disassemble a hat that fit me well and copy the pattern from it. So I took the old cap apart.
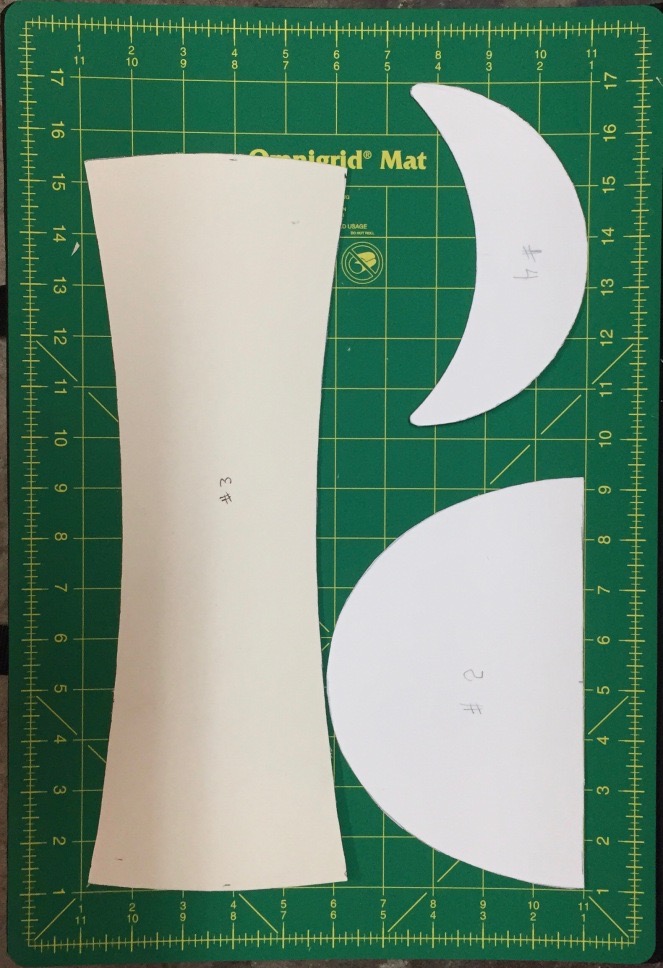
I used the pieces of the old hat to make templates for the new hats. The templates are cut from picture frame matt board. I will use them to make outlines on the fabric to guide the cutting.
Making the bill, with Pellon fabric stabilizer
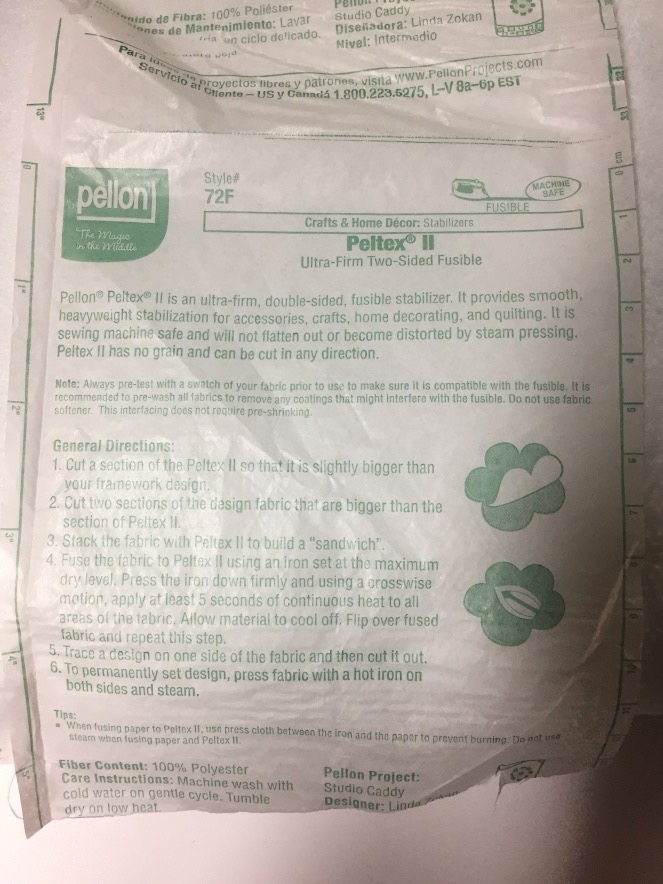
One can make the bill using a yogurt container material for the stiffener, but the result is a lot better when using Pellon fabric stabilizer. I use Pellon 72f fabric stabilizer. There are other fabric stiffener products out there too, although I have no experience using anything else. The plastic yogurt container method to make the bill is also an option. I describe that at the bottom of this post.
You can get Pellon 72f at fabric stores or online. It is a lightweight poly material that is easy to cut with scissors. Fusible means that there is a heat sensitive gel applied to it which is activated by a hot steamy iron. Fusible on both sides (two sided fusible) is what you want, so that both sides of the bill fabric are firmly attached. The resulting bill is durable and machine washable. You can fold it in half and sit on it and it will not be damaged or distorted. While it is best to allow the caps to air dry after washing, if it gets into the dryer, the bill will not be damaged by the heat. But be aware, the cap may shrink. .
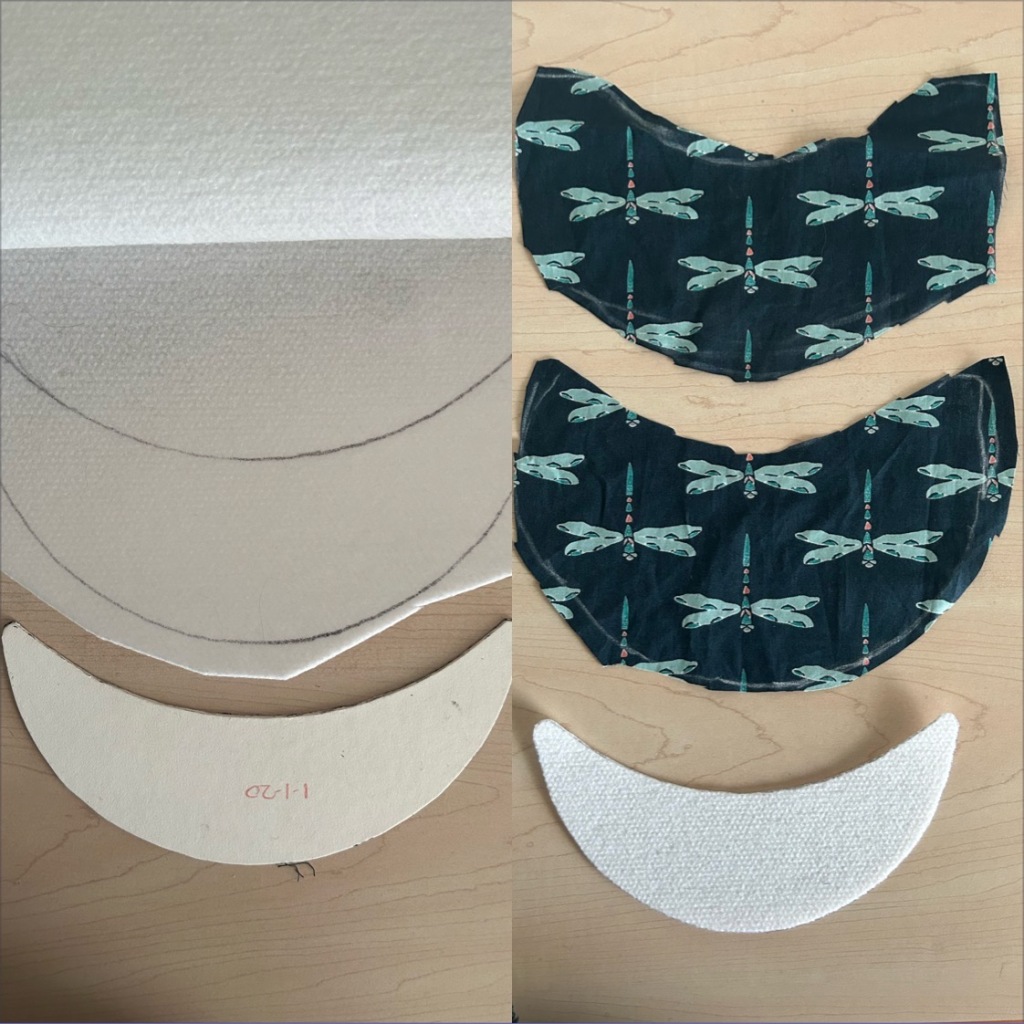
First, I draw the outline of the bill stiffener onto the Pellon with a pen using my template. Then I carefully cut it out. If I am sloppy cutting it, that will show, so I am careful to make clean lines. Next, I cut the bill fabric. leaving 1/2 inch or more for seams, and at least an inch on the inner bill area. The extra fabric on the inner bill will help absorb sweat.
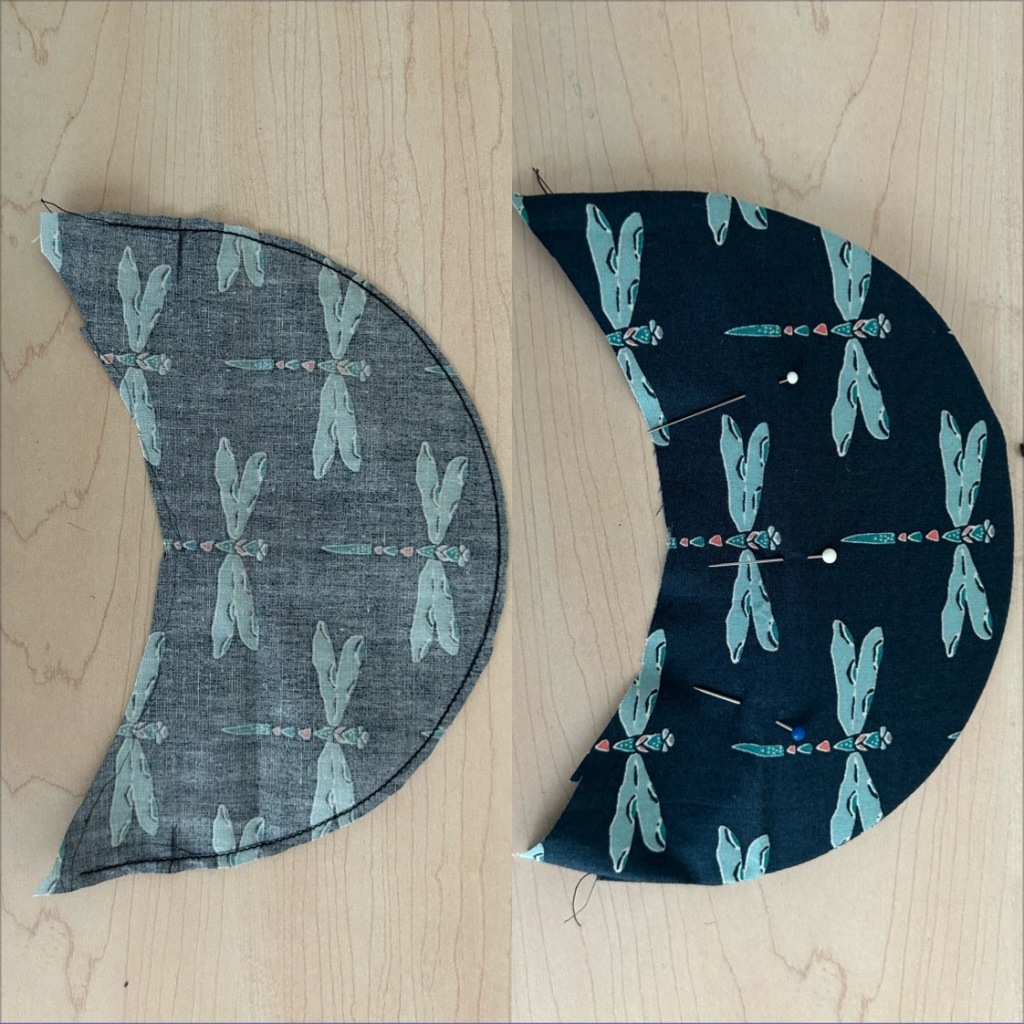
On the left shows the two bill fabric pieces sewn together. Short vertical pen lines mark the left and right ends of the Pellon stiffener inside the bill. I traced an outline of the cap brim on one of the bill fabric pieces. Then I put them together like a sandwich, inside out. Then I carefully sewed along the outer bill line, going a half inch or so beyond the end of the bill on each side. Then I cut away excess fabric, leaving about a 3/16 inch fabric hem on the outer bill curve. On the right, I stuffed the Pellon bill stiffener inside the pocket, with the finish side out. The 3/16” seam edge inside the pocket I arranged to all be at the bottom of the bill. This takes some manipulating of the Pellon and the fabric, but it is worth it to get this right so you don’t have any lumps in the bill. Then I pinned it to keep things in place for the next step- ironing.
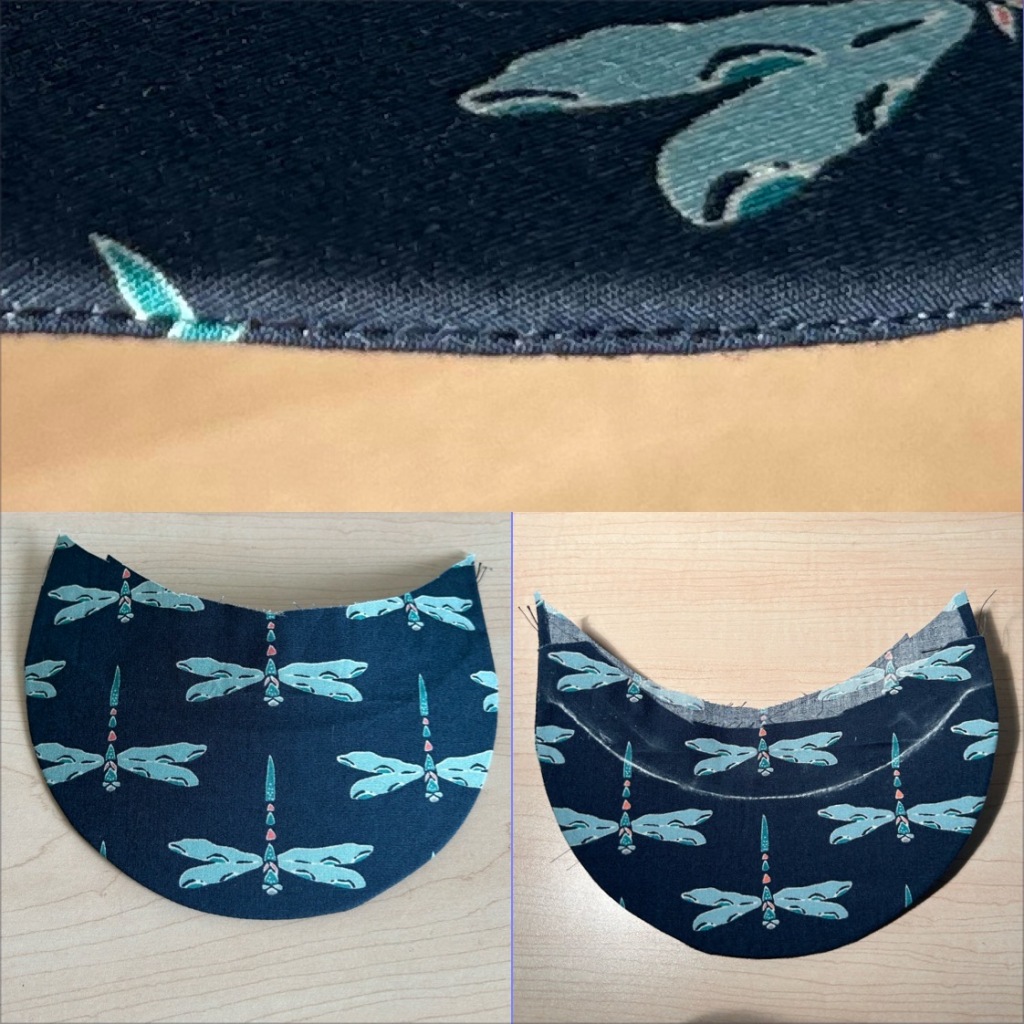
Above, in the upper image, you can see a closeup of the bill seam edge after ironing. The stitching is at the edge, and the upper bill area does not have the seam fabric inside. The seam fabric is underneath and cannot be seen unless you flip the visor up. This is what you want. The lower left picture shows the top of the ironed brim with a slight curve to it, rising at the center. After ironing, I immediately held it in a slight arch for about a minute while it was cooling. That allows it to acquire a natural curve which is retained when cooled down. The lower right segment of the photo shows the white chalk line I applied on the inner bill edge, after ironing. That will guide the sewing of the elastic band onto the cap.
To iron it, set the iron to hot and iron firmly with several shots of steam. The glue in the Pellon needs moisture to set it up. Iron it for about 10 to 20 seconds each side, using steam. I start ironing it at the front with the pins still in it. Then I remove the pins and iron the whole brim. After it cools, check that it is all well glued. You can iron it again if needed. You should not be able to pull the fabric away from the Pellon, anywhere.
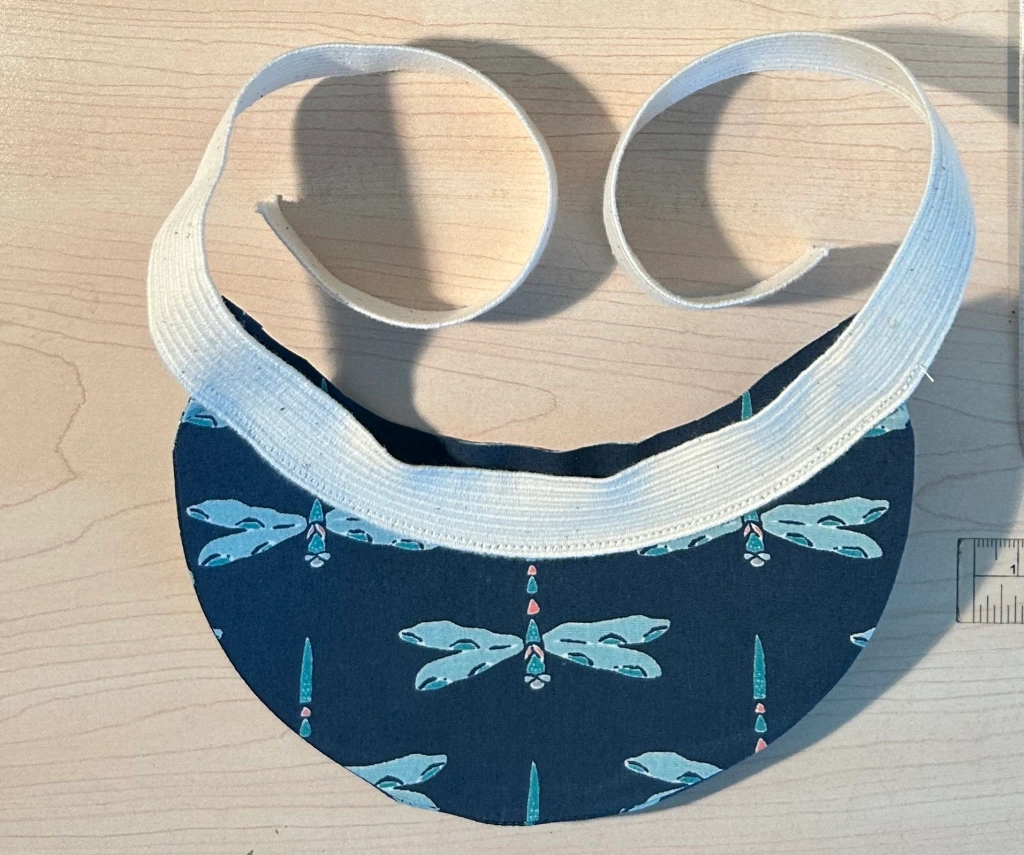
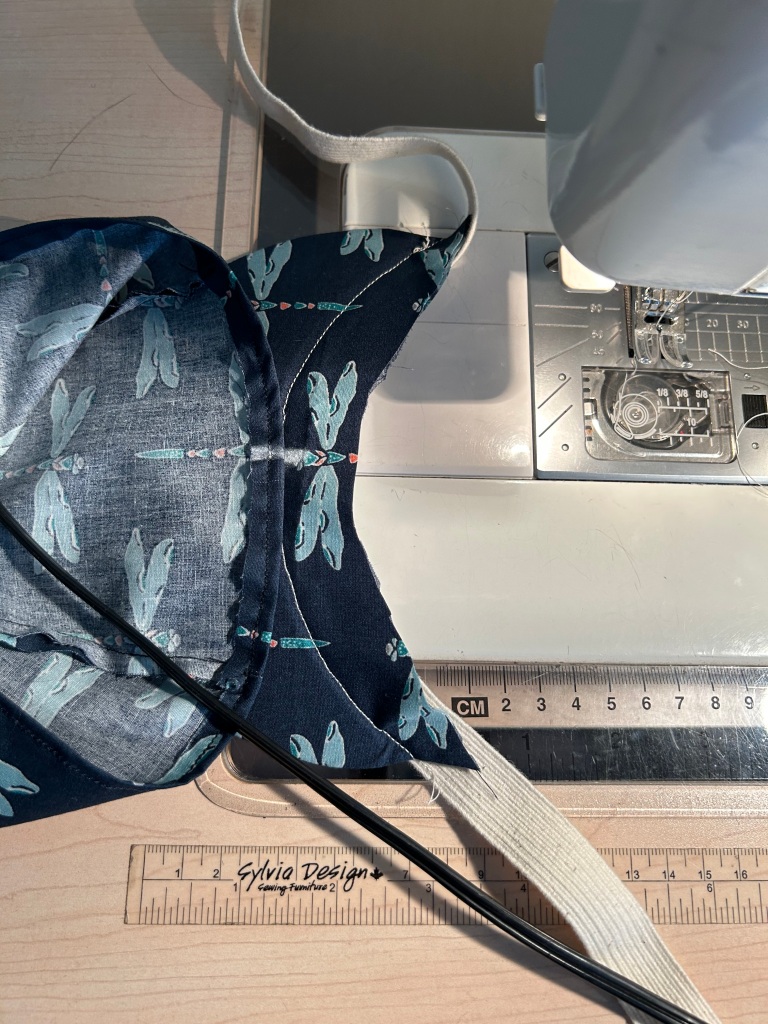
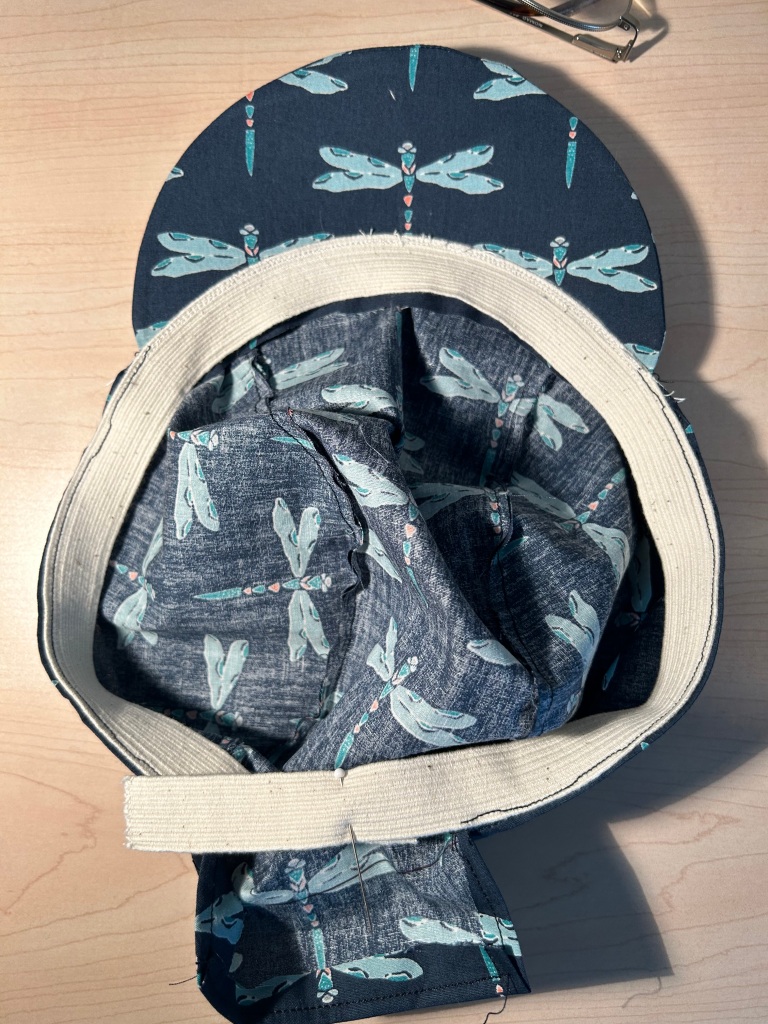
For this next step, I like to use a 3/4’ wide cotton latex stretch band material. Found in many fabric stores, it is sold to use for making swimwear. It will hold the hat on my head and absorb sweat and make things comfortable. If you have a latex allergy of course you would need to substitute something else. Most elastic in the fabric stores is polyester, but I prefer the cotton/latex. One can also use a non-stretch cotton fabric band and have a 2 or 3″ elastic band segment at the back. I think making the entire band of elastic does a better job of holding the hat on the head.
Cut a 26” length of it. On the lower part of the bill, make a chalk line along the inner curve, as in the photo above. Make a mark 1/2 way along the band. You want that mark to be at the middle of the brim, so that there are equal lengths along each side. It must be sewn right at the very edge of the inner brim. It’s okay to sew thru the brim, but just at the edge is what I aim for. Use a thread color to match the band material. I used white here. Sew very close to the brim edge, and very close to the band edge. Be careful; a sloppy sewing line is quite visible here.
Making the main body of the hat

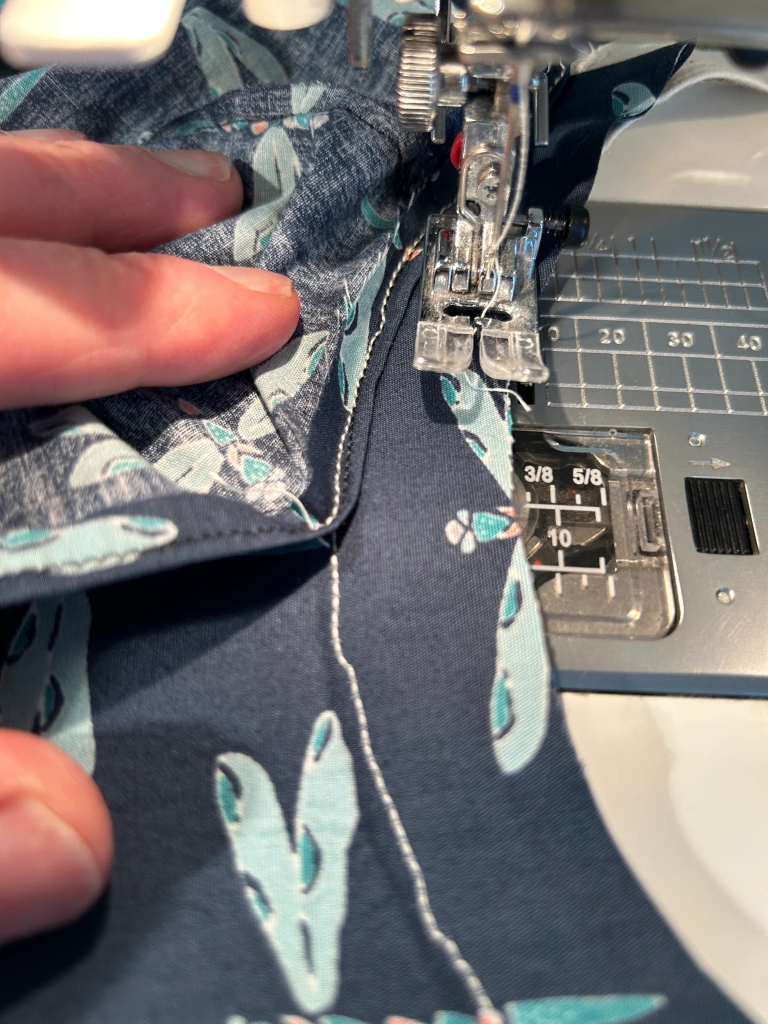
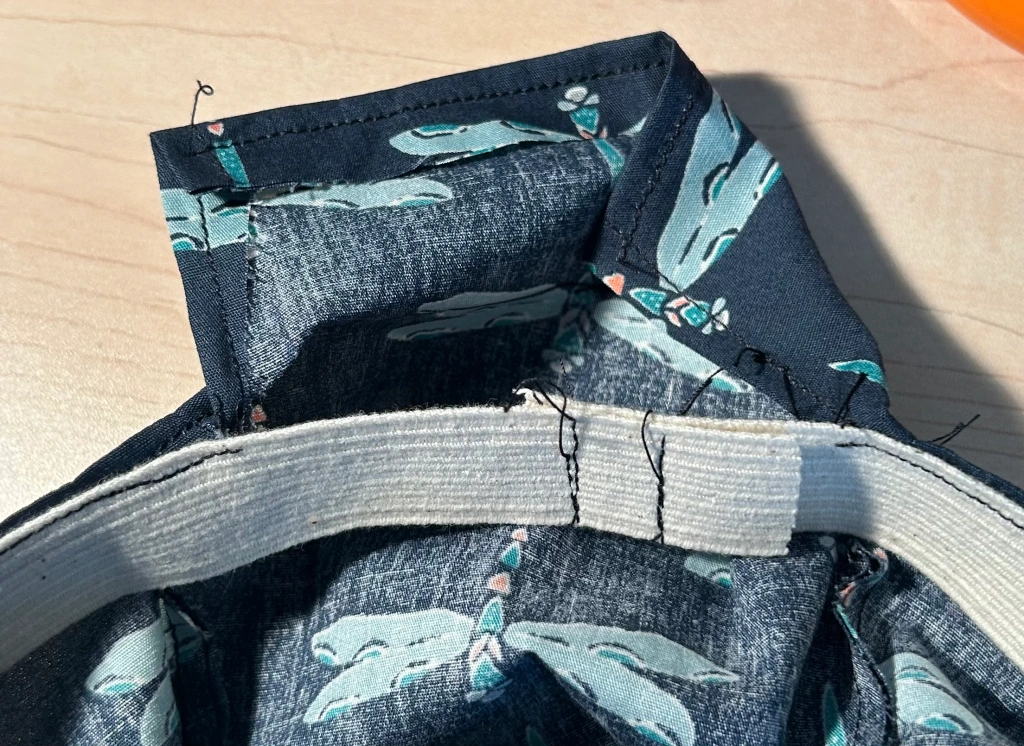
Above photo shows the center piece and the two sides are sewn together. I always start at the front of the cap (the front is on the left in the above photo) sewing along the curve to the back, and leaving a 3/16” hem all along the inside. Also, the bottom edge of the cap is folded up about 3/16” and sewn all around, except at the back flap. You can finish the hems with a serger or zig-zag stitching if you like. I leave them as is.
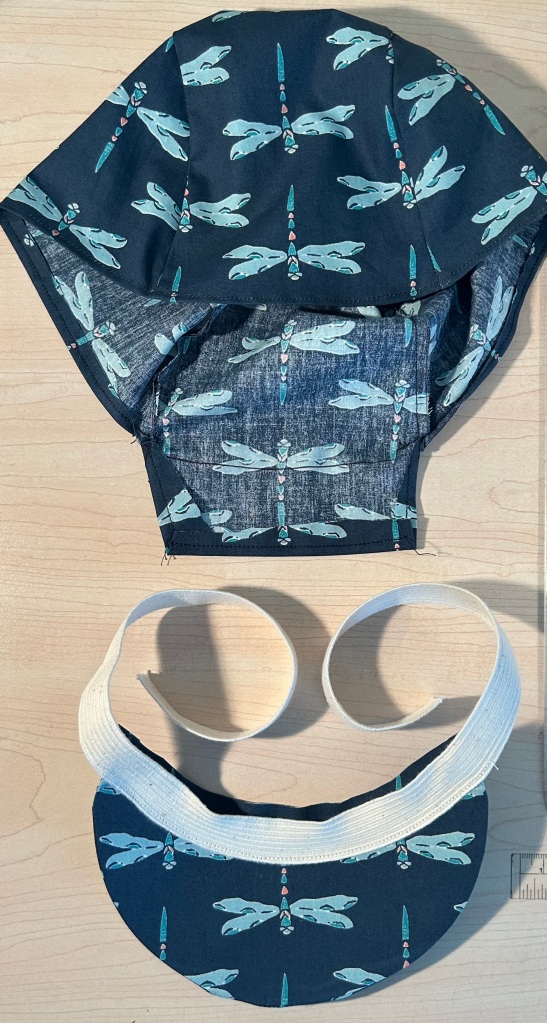
Now I want to sew the brim to the cap. The brim must be carefully centered at the front of the cap. I find the exact middle of the brim first and make a chalk or pen mark. Then I find the exact middle of the front of the cap itself. Here, the pattern indicates the exact center. I made sure the dragonflies were centered perfectly. So I line them up. I always sew from the middle to the side. My first sewing pass attaches only one side of the brim. I do this to make sure it stays centered. If I started from the side and sewed it all in one pass to the other side, it would probably be misaligned. After sewing the first half, I sew the second half, from the center outwards.

The plastic stiffener for the bill can be made of yogurt or cottage cheese containers too. But it is not as good as a Pellon stiffener. The edges of plastic will wear out the bill fabric before very long, and the plastic could crack or get bent. But it can work okay, and it is a way to recycle your containers which are otherwise not recyclable these days. The progression from container to bill stiffener is represented in the above photo. Cut away enough plastic material and use a hot iron it to flatten it out. Cover it with some fabric so the plastic does not melt. Iron mostly on the sides. If you iron it too much in the center it will get a M shape. Iron it so only a slight gentle curve remains, which takes some practice. Get several containers to practice on. When you are happy with the curve, use a pen to trace the line from the template on it and cut it into its final shape. Sew it into the fabric bill pocket. Stuff it in and arrange the bill hem so that it is all at the bottom,. Get it snug inside the bill fabric and pin it there. Then sew along the inside of the bill at the edge of the plastic stiffener to lock it in. After that you can sew on the elastic as you would when using the Pellon stiffener.

END
